Wednesday, August 31, 2011

No Gym? No Problem!

{photocred:tapperass.wordpress.com}

If you haven't noticed in my last few running posts (specifically this one) my master plan to stay in good racing shape involves a lot of cross training. For me, that comes in two forms; yoga and body-weight circuits.

I am not a member of a gym and, even though I love me some free weights, I don't really feel like putting up the cash for something I can essentially accomplish at home (plus, I'm a spinning instructor on hiatus, and paying for a gym membership is completely foreign to me).

Well, I've got some news. It turns out you DON'T need a gym and weights or machines to strength train. This isn't the first time I've said this (ahem, 100 pushups) but I'm here today to give you guys somewhere to start if you're coming up empty on the "ideas for new workouts" gauge.

The following is a half hour body-weight circuit geared towards toning muscles. It requires zero equipment and about ten feet of floor space.

(that's my mom. isn't she awesome?!?)
WARMUP:
2 minute light jog in place. Don't forget to stay on your the balls of your feet.
1 minute plank. Feel free to shimmy around in your plank, as long as you keep your body in one straight line, it will activate different abdominal muscles.
2 minutes alternating straight leg kicks, you can also walk and kick if you have the room.
2 minute recovery - stretch, drink water, breathe.

2 minutes alternating step back lunges, keep your weight in your front leg, drive with your back leg
2 minute sumo squat with press (with or without dumbells - you still get a shoulder workout without them)
30 seconds squats
30 seconds squat jumps
1 minute pushups with feet elevated (on a medicine ball or exercise ball if you have one)
2 minutes single leg deadlift with reverse fly (no weights is a-ok, I just couldn't find a video of what this looks like together - basically you go into your deadlift and then pull your arms out for the fly, then stand up straight again)
1 minute recovery

2 minute russian twists
1 minute knee tucks
1 minute plank walks (holy harder than it looks)
2 minute single leg deadlifts
1 minute froggers
1 minute two foot forward/backward jumps (exactly how it sounds, jump forward and backward with both feet as fast as you can)

COOL DOWN:
5 minutes stretching - quad stretch, hammy stretch, lower back twists. Just stay in these positions for 30 seconds - 1 minute per side.

Still think you have to go to a gym to get a good workout? Seriously, you have to try this out. I did a 45-minute body weight circuit the other day and was sweating like a maniac. If you're not used to it, you'll definitely be a little sore a day or two after you work through this. 

How do you get in strength training without a gym?

Tuesday, August 30, 2011

Homebrew Review


In my post about homerewing, I posted pictures of a beer that was highly not my own because that is what I happened to be drinking at the time I was taking pictures for the post. I have been saving our homebrew for something wedding related (which I will not disclose at the moment since some of the people in my bridal party read my blog) and I didn't think I had any more to open and take pictures of.

Wouldn't you know it? I did.

I want to keep a record of the beers that we liked (or didn't like) and what was in them so down the line I can eventually conjure up my own recipes. You, my friends, are going to bear witness to my homebrew record. Hence, the homebrew review. First up, the Brewer's Best Summer Ale kit.


Name: Summer Ale
ABV: 4% - 5% (no idea if ours is anywhere near this, because I suck at reading the hydrometer)
IBU's: 18-20
Ingredients:

  • 3.3 lb Pilsen LME (Liquid Malt Extract)
  • 1 lb Wheat DME (Dry Malt Extract)
  • 1 lb Pilsen DME
  • 8 oz. carapils (the grains)
  • a spice pack with bitter lemon and orange peel
  • .5 oz bittering hops (I didn't write down what kind! Eff.)
  • .25 oz. flavoring hops
  • .25 oz. aroma hops
  • Safale US-05 yeast

Package Description: Pleasant citrus notes come from the bitter orange and lemon peel. This beer finishes clean with lingering flavors of citrus and spice. Crisp and refreshing.

My take on it: It's definitely a bit citrus-y but not overwhelmingly so (like the Leinenkugel Summer Shandy IMO). That being said, this isn't my favorite on the beer flavor scale. It's a light bodied, blonde summer wheat, which I usually love in the summertime, but I think I want it to be a bit more hoppy or something, it's definitely not high on the hops scale. There is something about it that just doesn't pop. Since I can be a bit of a beer snob, I think the flavor is too "big box" for me. In truth, that could be for a number of reasons, so I'm not going to blame it on the kit or the ingredients - it's highly possible I could have done something wrong, after all, this was our first homebrew. All in all, it's not something that I wouldn't drink (I am sucking one down as I type this) but it's not my favorite. It sure does look pretty though!


Next up: Brewer's Best Imperial Nut Brown 

Thursday, August 25, 2011

Stay In Motion


People in motion stay in motion.

Law of inertia, right? I learned that in high school science.

I have a tendency to train for one or two big races a year and then just go into no-man’s land with running once the race is over. I love it, but after training for a big race, I always need a break. My intention is always to keep my running up after the race, but (often without a plan) I get lax about it very quickly.

And that happens every. single. time.

So, I was on the plane to Charlotte, headed right into the path of Hurricane Irene and reading the backlog of my Running Times magazine and there is an article that really struck a chord with me. It’s about running an endless season: not training for a specific race, but being race ready all year long.

So, if you’re like me, what I’m about to share with you is how to make a paradigm shift in your training mentality and give you a way to put that into action. Effective immediately.

The components to the “stay in motion” plan are (in no particular order):
  •  Intervals – also known as speedwork, up to 6 miles of high intensity intervals; mile repeats at 5k–10k effort with recovery jogs in between; 800m repeats at a 5k effort with recovery jogs in between; 100m sprints; fartleks of any shape, size or flavor. Whatever kind of interval is singing to you on a given day, but keep switching it up to keep your body continuously improving.
  • Frequent weekend races, or VO2Max runs (high intensity) – this is a sustained, unbroken efforts at 85-95% of your current best 5k effort, or a 5k or 10k race. The adrenaline associated with racing more often than not, causes you to sustain a more intense pace than you would on any normal run-of-the-mill run day. If you’re not racing, this might be a shorter, faster tempo run anywhere from 20-40 minutes long.
  • Easy runs – slower, more relaxed runs anywhere from 30 – 60+ minutes that will make up the bulk of your weekly mileage.
  • Midweek longer anaerobic runs – the second longest run of the week, at a moderate effort. I’d recommend running with a running group or a fast running partner or running hills for this one. Just so you don’t get sucked into letting this fall into the “easy run” category.
  • Weekend long runs when not racing – this is your long, slow distance run when you’re not otherwise occupied with a race. Roughly at the same effort as your easy runs, just over a longer distance, just keep this run mellow.
  • A true recovery day –the most important part of the stay in motion plan. Even if you do a short run-walk, walk, easy bike ride, hike, etc., our strength coach in college used to call this “active rest”.  Take this day for yourself (I use it to get my life back in order, cook, clean…) Something to get a bit of blood flow to your muscles on your recovery day is good, stretching is great, smiling is a must.
  • Strides and accelerations – 50-150m hard efforts, but done without too much straining. I like to throw 4 or 5 of these “strides” in at the end of my easy runs to help teach myself to kick into gear at the end of a race.
  • Cross-training – this is the second most important component of this plan. Give yourself a break from pounding the pavement, but stay active and get your heart pumping. I regularly practice yoga as a form of cross training and try to use my Nike Training Camp app for body weight circuits as often as possible. Whatever works for you.


There are a couple of other important parts of this plan. One is f.l.e.x.i.b.i.l.i.t.y. I think I mention this every single time I do a post about my workout schedule, but I can’t stress it enough. You can always plan a plan, but you can never plan results. Sometimes you just don’t feel like working out, sometimes your commute to or from work takes WAY longer than you expected it to. Whatever it is, take it one breath at a time and just be flexible.

The second important part of this a bi- tri- or quad-weekly week of lower mileage. Especially if you’re a new or injury prone runner. I found this chart in a different Running Times magazine that suggests how often to have a down week:

Your “score” is how often to take an easy week. So if you fall into the first category, you should make every other week and easy week. If you are in the second category, you should make third week and easy week, and so on and so forth.

I, for one, am going to start with an easy week every other week, to avoid burn out and injury. So, when most training plans go through a 7-day cycle, my stay in motion plan will be more of a 10-14 day cycle. Here is an example of a two week rotation:

Then you just start over again at week one. For me, Tuesdays and Thursdays are my “date night” runs with Brandon. Since he’s the expert in all things speedy, he is going to orchestrate our speedwork.


{Aside: I am so lucky that he’s willing to stay with me when we run. Honestly, he is SO FAST.}

The cool thing about this plan is, theoretically you should be able to continuously improve if you approach this properly in terms of intensity. You can keep a comparison of your race times and use any good running website (Runner's World Smart Coach or Greg McMillan’s pace calculator) so you can determine what your workout paces should be. By continuing to work out at the correct effort you for now, as your race times drop, you’ll start training at faster speeds. So essentially, fitness will come to you rather than forcing workouts to make races happen.

Oh, and one more thing. Say you want to lay it all out for a certain race, you can tailor your workouts to be more event specific for a few months (plus a taper period!!) and you should be good to go!

How do you stay fit, even when you’re not training for a race??

Homebrewing 101


In my post about the Make Vs. Buy price comparison, one of the items that I mentioned was more economical to make rather than buy was beer. Well, it wasn't up until the other night that I actually tasted my own brew.

I'll tell ya what, I was almost shocked that it tasted like real beer. We did it! Made our own beer. Not only is it more economical to make your own beer, but it's not all that hard either! It just takes some time, so if you're planning to do it - make an afternoon of it.

Better yet, make a cold afternoon of it.

We don't have a hood over our stove and, boy, does it get hot in our house when the stove is on all day! Beer brewing is definitely a winter sport.

So, we made a highly successful summer ale (and have creative wedding-related ideas of ways to use the brewski...but, more on that later). There is a whole science behind brewing beer, to which I'm not quite privvy yet, but I aim to be able to come up with my own beer recipes someday. Until then, I'm going to use the pre-made recipe kits and learn as much as possible about brewing.

Here are the brewing basics...

{photocred:http://www.ldcarlson.com/}

Step 1: Obtain all the essentials. Stockpot, fermenting vessels with lids (5 gallon buckets and glass carboy), siphoning tubes, airlock, stirring paddle, thermometer, hydrometer, bottle brushes, cleaner and sanitizer, and ingredients. You can get all the beer brewing equipment as a kit for about $130, not including the ingredients.

Step 2: Clean and sanitize!! Probably the most important part of any kind of fermenting process is the cleanliness of the brewing vessels. If they're not bacteria free, you could end up with mold, or you might even kill the wonderful yeast that is the orchestrator of the whole process; converting sugar to alcohol. I am lucky enough to have a fiance who works in foodservice and has access to a no-rinse sanitizer that they use in the store. I'm sure you can get a good sanitizer wherever you get your brewquipment from.

Step 3: Steep the grains. Some of you are undoubtedly homebrewing experts, but I'm still at the extract kit stage; so everything's packaged nicely and neatly in the correct portions for me before I even begin. Extract brewing is the way the fermentable sugars are provided to you (in extract form) so you just add them to your wort and go. Extract brewing = beginner brewing. Partial mash brewing = intermediate. All grain brewing = advanced. I'll talk more about the other two when I get there. Not yet.

So for now, I steep the specialty grains that come in my ingredient kit, which primarily provide color, flavor and body to the brew, but no fermentable sugars.

Step 4: Boil the malt extracts. This will probably take two people; one to pour, one to stir. Add all of your dry extracts and liquid extracts and get them mixed well into the wort. These are all your fermentables, so they're an important step. Just don't let it boil over from here on out, because you'll end up with a sticky mess all over the oven.

Step 5: Add the hops. If you have an extract kit, the directions will tell you when to add the hops and how long you have to boil them. Usually you add the bittering hops first, then the flavoring hops, then the aroma hops (the latter two in the last 15 minutes of the boil). A hoppier beer sometimes has the added step of dry hopping during the secondary fermentation.

Step 6: Cool the wort. As you can see in the picture below, brewing beer is simply a heat transfer problem.  To cool the wort quickly (and by quickly, I mean about an hour as opposed to overnight) fill up your sink with cold water and swish the pot around so that the heat is transferred to the cooler water in the sink. You'll have to empty and re-fill the sink several times and it will take about an hour to cool it to around 70 degrees (F). 

Step 7: Transfer to the primary fermenter, add water, pitch yeast. When the wort is cooled, you siphon it off the "trub" (the hops sediment that will be left at the bottom of the stockpot) into the primary fermenter. Add enough water to turn it into 5 gallons and then sprinkle the yeast on top and mix it in. Brewing yeast

Step 8: Ferment, and then ferment some more. You can either use the primary fermenter for the whole process, but if you want clearer, more delicious beer, you are gonna want to transfer it to a secondary fermenter about a week into the fermentation stage. The dead yeast cells will precipitate down to the bottom of the primary fermentation pail, then you want to siphon off the liquid into your secondary fermenter (the carboy) to complete fermentation. At the secondary fermentation stage, you can add more hops for a hoppier, IPA-like brew. 

Step 9: Bottle. You'll have to transfer your brew to a bottling pail and add corn sugar to it. Once it's bottled and capped, it continues to ferment, but this time it causes the beer to carbonate because the CO2 that is created gets captured inside. Then, more waiting.

(buuut you should definitely taste your beer when you're bottling)


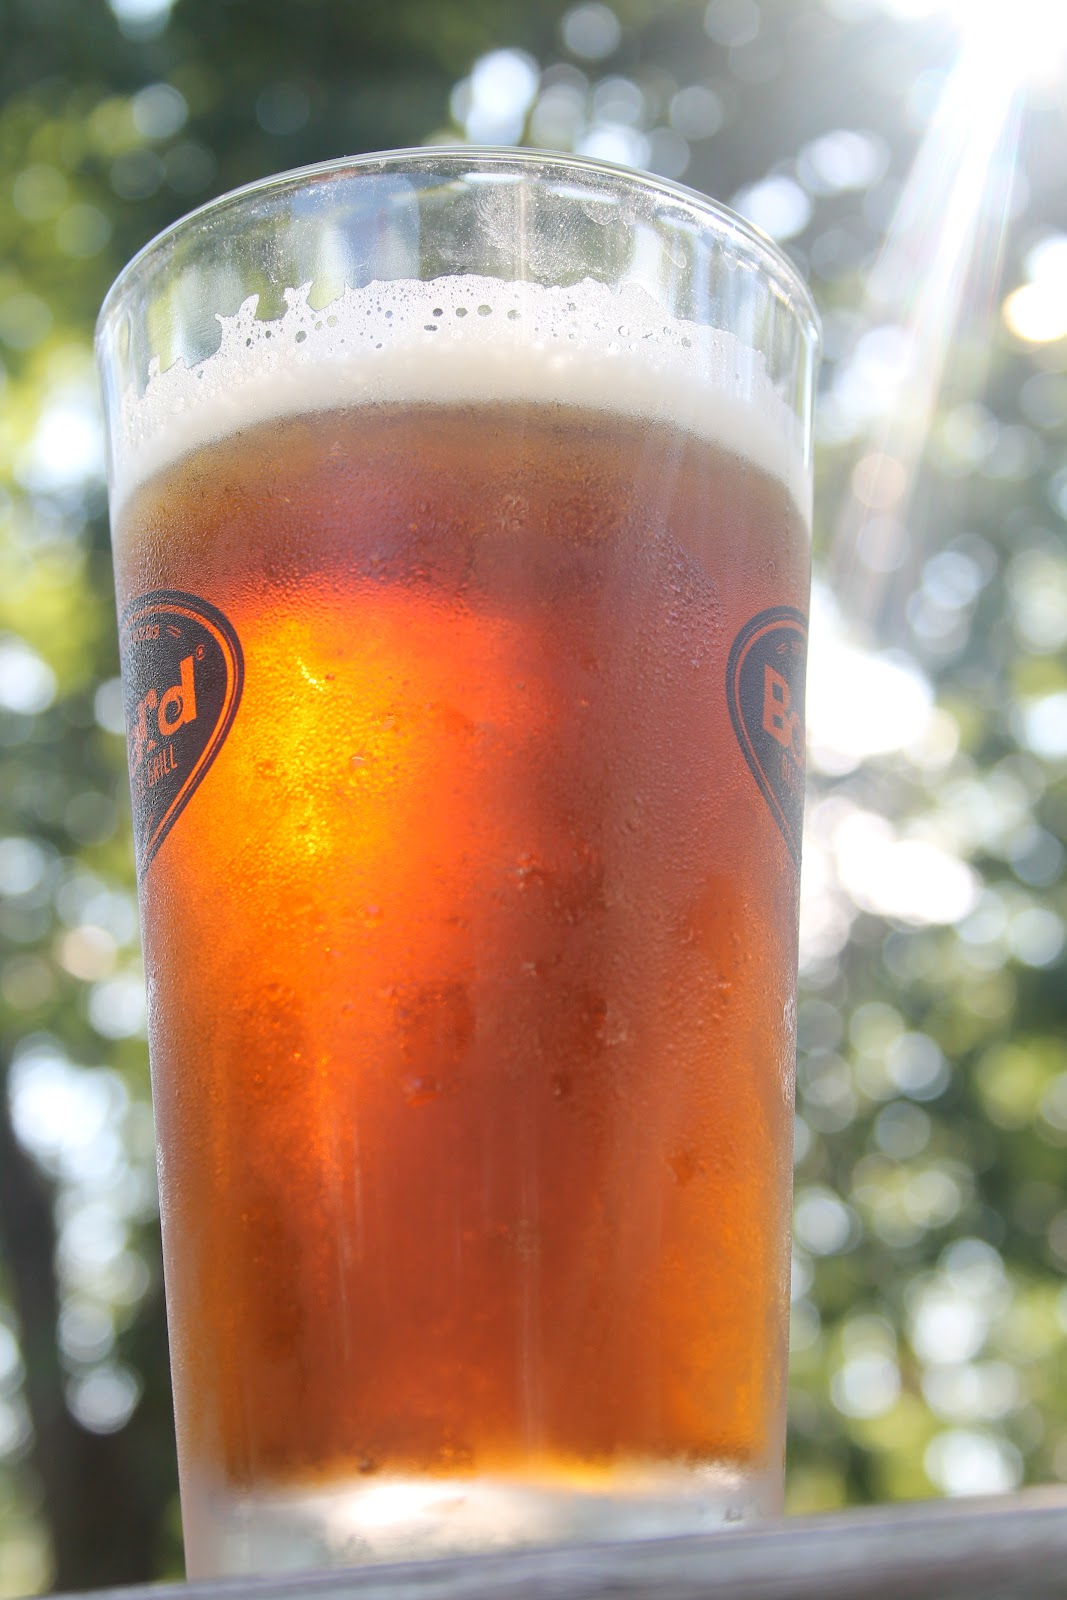
A few weeks later...ta-da!! Beer. Real, live, carbonated beer. Homebrewing has become my new love.

For more resources, some online colleges offer cooking and culinary classes on a wide range of surprising topics, home-brewing included. Oh, and just to set the record straight, the above pictures are not MY homebrew, it's a Goose Island Harvest Ale, our first homebrew was a summer ale that came is a much lighter bodied beer. At the time I was taking pictures for this post, all I had was the Goose Island beer.

My summer ale was surprisingly delicious but (kick me for saying this) I'm actually excited for the fall and all the darker brews that come with it!

Is anyone else excited for the fall??

peace+love,


Monday, August 22, 2011

Changing It Up


I've run four half marathons in my running tenure and, although I love training  for marathons, the half marathon is where my heart is. It's my favorite distance. It's a much easier race to train for, in my opinion, than the marathon. Less of a time commitment, but can still be high mileage if you want it to be...or not. It's a very flexible distance.

That being said, I have gotten slower just about every half marathon I've run. One of my tips to avoiding that "omgIhaven'ttrainedandI'mrunningamarathonin3days" feeling is to change things up. So this time around, my change-up is working on a new half marathon PR. 

According to athlinks.com (great site btw!) my half marathon results are as follows:

In an old issue of Running Times that I hadn't read, I found an article with training plans to PR in a 5k. Since the mileage was fairly high, I tweaked the plan a little bit for half marathon distances and voila! Half marathon training plan, with lots of speed work thrown in.

To change things up this time around, I am trying to work in my lactate threshold range and trying to increase my VO2Max. I'll be starting out with mile repeats (intervals) and tempo runs at my "lactate threshold pace" which, according to this article, is 10-15 seconds slower than your 5k goal pace.


For me, that's a 9:10-9:15/mile pace.


LT (lactate threshold) intervals go something like this:

  • 1-2 mile warm up
  • anywhere from 3 to 5 one-mile repeats @ LT pace, with a minute or two rest in between
  • 1-2 mile cool down
Tempo runs are pretty run of the mill:
  • 1-2 mile warm up
  • anywhere from 2 to 5 miles consecutively at LT pace
  • 1-2 mile cool down


In a few weeks, I'll be concentrating more on VO2Max intervals and more tempo runs at a lactate threshold pace. For my VO2Max intervals, since I'm trying to increase my VO2Max, the article recommends you train at   the fastest pace you can maintain for about eight minutes. 


For me, that's about a 8:25-8:35/mile pace.


VO2Max intervals go like this:
  • 1-2 mile warm up
  • up to 5 repeats of 1-ish miles at VO2Max pace (I say 1-ish miles, because the training schedule sometimes calls for 1 mile, sometimes for 1200m and sometimes for 1000m)
  • 1-2 miles cool down
Additionally, my regular runs are going to have a few 30-second pace pick-ups thrown in as well. Sometimes these are called "strides" and it's usually recommended that you add them in at the end of a run to train yourself to kick at the end of a race. 

I'm 8 weeks out from my next half marathon (which also means I'm 8 weeks away from my birthday!) This week was a more relaxed week for me because I gave myself a bit of time to recover from the BikeMS ride last weekend. My projected (light blue) vs. actual (darker blue) week-end mileage


So, we'll soon see how the training goes and if my plan to speed things up a bit works. Happy half marathoning! 

Wednesday, August 17, 2011

Reigning in the Budget: meal planning


Here's another "reigning in the budget" topic that I have not touched on yet: meal planning. I generally go to the grocery store with a shopping list, but it's not always that I go to the store with a meal plan in mind (and you know it's bad when I go with none of the above).

When I started this series of posts, I started saving grocery receipts. Whether or not I had a plan, a list or just wanted to pick up dog food, I wanted to see about how much I was spending every time I went to the grocery store. So here I am, armed with a bit of evidence, to tell you that meal planning is a really good way to keep your grocery bills under control.

exhibit A

  • 06/02/11, grocery shopping @ Giant Eagle with shopping list but no meals planned: $78.16
  • 06/12/11, grocery shopping @ Whole Foods with meal plan/shopping list: $32.94
exhibit B
  • 06/25/11, grocery shopping @ Earth Fare with a shopping list but no meals planned: $101.08
  • 07/10/11, grocery shopping @ Trader Joe's with meal plan and shopping list: $53.27
Now, granted, we're talking about four different grocery stores here. Also, you have to take into account that it's summertime and I do a lot of shopping at the farmer's market - sans list (since you never know what you are going to find!) So, take those numbers with a grain of salt. All I'm saying is that there has been a significantly lower total when I have a few meals planned for the week and only buy what I need for those meals.

My course of action is to choose three meals that I want to make for the week, the only rule is that I have to be able to at least make enough for dinner and lunch the following day. Breakfast is usually overnight oats or bread with cheese, or an egg sandwich (eggs and cheese are staples, and therefore are almost always on my shopping list, bread is something I generally make myself). Then, any days that aren't covered by leftovers are usually a sandwich or something thrown together by other pantry staples. For the meals that I am planning to make, I (obviously) only buy what I need. 

So far, I've found that planning meals in advance has been one of the best ways to keep my grocery bill down. It doesn't happen every single week, because of traveling or just being lazy, but even having a meal plan for one grocery visit per month will help the bottom line. I can buy into that! 


peace+love,


Need to catch up on my Reigning in the Budget posts?

Tuesday, August 16, 2011

Ride Recap: BikeMS Pedal to the Point


This weekend was an experience and a half.

While I was on my bike on the way out to Sandusky, trying to find a comfortable way to sit on my bike that wasn't putting too much pressure on my sore butt, but also wasn't causing my shoulders to tighten up (not an easy feat), trying to keep myself from overheating and from chafing and from getting grumpy with my teammates, I realized something. The battle I was fighting through mentally and physically was representative of what people living with MS fight through every day.

That thought was completely humbling for me.

It suddenly dawned on me why we were riding 150 miles and not just running a 5k. It wasn't just to raise money for a great cause, or even to raise awareness by making people driving by wonder why there were 2,500+ bikers on the road. It's also meant to raise our own awareness. Not only did I raise money for those living with MS, but I basically fought the battle that they fight every day.

I am so amazed at what those people living with MS are capable of and the drive that they approach each and every day with; the drive to push on through.

Like I said, it was humbling.

We set off at about 7:45 a.m. on Saturday morning, without really knowing what to expect along the route. That was the toughest part about the ride out - apparently we missed the little maps they were giving away that said how far away each rest stop was. Between my garmin, Emily's speedometer and the signs along the way that said things like "Mile 26: if this were a marathon, you'd be finished!" (none of which told us the same mileage) we had an idea of how far along we were, but were never really sure. So, not being able to have definitive checkpoints - make it 4 more miles, that's where the next rest stop is - was pretty difficult.

I think we were all feeling good up until lunch. By the time we got to that stop, we were all famished. So the refuel was a much needed break and a chance to get out of my sweaty bike shoes. After lunch it got HOT. I couldn't put enough sunscreen on. Regardless, it didn't rain on us, contrary to what the weatherman was predicting. I was totally okay with that.

We made it to Sandusky by about 4pm, after being on the road for about 7.5 hours (with gratuitous stops, our ride time was closer to 6 hours). Ate at the high school, hopped the bus to our hotel, bought some beer from Walmart (where we almost couldn't get it because I had left my ID in the hotel room and they wanted to check ALL of our IDs), showered, ate more, watched TV and passed out at 9 p.m.


Sunday was much cooler and cloudier, which I was totally enjoying because my skin wasn't about to take another hot sunny day on the road. We knew we were going to get some rain, but had no idea that it was planning to stick around all day - so we were completely unprepared for it. Luckily we managed to make it through about 30 miles before we caught the brunt of the storm, but it hit us full force when we were about 10 miles from the lunch rest stop. Not only were we hungry, but Emily was muscling through some serious knee pain and we were getting buckets of water dumped on us while on a moderately busy highway in Oberlin.

We got to the lunch stop and Emily had already made the decision to take the bus to the finish - her knee just wasn't going to hold up. She couldn't even clip into her pedals at that point because it hurt too much to put pressure on the pedal. Brandon and I struggled with the decision for a long time; do we muscle through it? Or do we let go of our ego, and avoid a potentially miserable, wet and unsafe last 35 miles and call it a success anyway? We chose the latter.

I'm just not that confident in my riding to ride through those storms that we got yesterday. We weren't prepared to be totally drenched for the next 3 hours.

Even though the decision put me through a bit of emotional turmoil, I am so proud of what we did this weekend. I did not quit, I still accomplished the goal I set out to achieve - raising money and (more importantly) awareness for MS. I am so proud that I was able to go as far and as long as I did and was able to let go of my ego when I thought my well-being might be in jeopardy.

I learned a lot about myself this weekend, and I am truly humbled by my experience. I have so much to be thankful for in my life, and today, I am thankful that I have been given another chance to wake up and breathe, be happy, be healthy and be right here.

peace+love,


Friday, August 12, 2011

Garden Guac (and salsa!)


I'd like to say I eat seasonally. Generally, I do. Except when it comes to avocados.

All year. Er're year.

So, you should definitely be surprised to know that I haven't bought an avocado all summer (welllllll...more or less). Until last week when I decided to make salsa with tomatoes from the garden. Our good friend, Mikey, thought I should try this guacamole recipe he had, to complement the salsa, so he offered to get us some avocados.

I'm not stupid. I never turn down an avocado.

It also just so happened that I had fresh Ohio corn which the recipe called for (seriously, if you don't live in Ohio, make a trip...just for the corn). 


It also happened to be a summery, relaxing Sunday and I had ample time to fire up the grill have Brandon fire up the grill. Sounds like a recipe for gloriousness if you ask me!

Charred Corn Guac
adapted from Bobby Flay’s Bold Flavors

Prep time: 15 minutes (most of it soaking the corn)
Cook Grill time: 20-30 minutes

ingredients:
  • 2-3 ear fresh Ohio corn (!!)
  • salt + pepper to taste
  • 4 tbsp olive oil
  • 3 avocados, diced
  • 2 jalapeno peppers, diced
  • 1 small onion, diced
  • juice of 1 lime
  • ½ cup cilantro, chopped
  • ½ medium sized lemon boy tomato, diced

directions:
  1. Husk corn and soak in a bowl with salted water for 10 minutes.
  2. Grill the corn for 15-20 minutes, turning every 5 minutes until the kernels are tender.
  3. Brush the ears with 2 tbsp olive oil and season with salt and pepper and continue grilling until they are golden brown.
  4. Shuck corn and combine with all other ingredients.


And just in case you are hosting a party and want to make sure you have enough chips and dip to go around. Here is the garden fresh salsa I made.

For the record, we weren't hosting a party. Salsa + guac was just for us!


Summer Tomato Salsa
adapted from The Joy of Cooking

prep time: 10 minutes
cook time: 0 minutes (assuming your corn has already been cooked)

ingredients:
  • 5 big boy and lemon boy tomatoes
  • 1 medium white onion
  • 2 jalapenos peppers
  • 1 habanero pepper
  • 1 large garlic clove, diced
  • 1 ear of grilled corn
  • 1-2 tbsp lime juice
  • ¼ cup cilantro
  • 2 tsp ground cumin

directions:
  1. Chop tomatoes and onions and mix them in a medium sized mixing bowl.
  2. Dice peppers and garlic and add to mixing bowl.
  3. Shuck corn and add to bowl.
  4. Chop and add cilantro. Add the lime juice and cumin and mix everything together. Let set (preferably overnight) to let the flavors marry.

What is your favorite dish to make with fresh from the garden veggies?

peace+love,

Thursday, August 11, 2011

Kodak Gallery Photobooks

It was with my hair-down hippie-dancing at the Dave Matthews concert where I wooed Brandon. Hook. Line. And sinker.

So, it should come as no surprise to you that we got engaged at Floydfest, where I had ample opportunities to let my hair down and get my hippie dance on.

Four days and many pictures later, I needed a way to document one of the most memorable experiences of my life. Foodbuzz Tastemakers Program to the rescue! As a Foodbuzz Featured Publisher, I have the opportunity to be a part of their Tastemaker program and sample/write about various products that they would like to feature. Just in time for Floydfest and the wonders that were about to be bestowed on my life, the Tastemaker program was offering to try out a KODAK Gallery Photo Book!

Full disclosure: as part of the Foodbuzz Tastemaker program, I was offered a KODAK Gallery Photo Book free of charge. 


Knowing full well that I won't take the time to make a trip to target to buy a photo album, nor will I bother to get any of the photos printed...this is an awesome way to preserve your memories on paper without much work.

(My coworkers call me "the laziest active person they know")

Seriously guys, when I say this takes very little effort, it's takes VERY little effort. I'm already uploading pictures for blog posts, this takes about that much effort. Upload. Arrange. Order.

Easy peasy!

Now I'll have those incredible memories pretty much engraved in stone (in addition to on my hard drive). When we tell our story to our grand-children, we'll have a real photo album to show them, just like our grand parents did!

If you're really into design, it doesn't offer a ton of options, but for me that was the great part about it. No frills, and more importantly, not too many options. Too many options always makes it difficult for me to make any decisions. Here's the front page of my photo book:
You can look at your book as a whole, or one page at a time:

Here's the great part for my readers - KODAK is offering 40% off of a medium or large hardcover Photo Book! All you have to do is click this link to redeem it (the offer is good until 8/31/11). So if you're in the market for a photo album, head in that direction quickly!

peace+love,


Wednesday, August 10, 2011

my se7en links

At first I thought that title looked cool...but it actually doesn't. Dang.

I know that (once again) I am late to the game on this, but a few weeks ago, Alicia tagged me in her 7 Links post. It's the social media meme taking the blogosphere by storm with the goal of letting no post go unnoticed! 

Alicia! Thanks for the tag :) I feel silly being so excited to be a part of this..but that is what it's all about right?! We're all in it together!

My Se7en Links (yet, I still use it. I'm a huge tool)

(1) most beautiful.
a defining moment. I have linked and re-linked to this post before, but the story of how Brandon and I met is so poignant for me, especially now that we're engaged. I just want to share my joy with the whole world! Can you blame me?!

(2) most popular.
According to my blogger stats: I design orthopedic implants...not breast implants..., which talks about what I do for a living, is the post with the most pageviews. Most popular in my opinion, based on feedback and comments would have to be Home Sweet CLE: A Tribute to CLE Bloggers. In that post, I express my gratitude for all things great about Cleveland, especially the blogging community.

(3) most controversial.
Rreeeeach for the Stars! Honestly, I couldnt' find anything more controversial than this...and I only think it was controversial because my friend left a mini-novella of a comment about things that could be better choices for me.

(4) most helpful. 
Reigning in the Budget: the make vs. buy comparison, (or if you needed a new drinking game, Beersbee). I did a lot of work on these posts (I'm specifically talking about all the math in the budget post) and I hope that my readers found them helpful. At the very least, writing them was helpful for me!

(5) surprise success. 
Anatomy of a Training Run: Run/Walk, actually...any of my Anatomy of a Training Run series really went over well with PL&B readers:
Tempo Runs
Yasso 800s
The Hydration Edition
Fueling for Long Runs

(6) not enough attention. 
12 Steps to Sustainability, where I outline 12 ways I am making my life a little greener. "One grain of rice can tip the scale" ....what movie?!?

(7) most proud of. 
Race Recap: Cleveland Marathon 2011, where my pre-race anxiety (because of things that were out of my control) lead to a heart rate that was higher before the starting gun than it was for the whole race. It was an incredible experience that I got to share with Brandon. Even though it wasn't my fastest marathon, it was my favorite thus far. 

Holy links! What do you guys think? There is WAY more than seven links up there. Here are my "my se7en link" blogger nominations:
Amanda @ There Are Two Sides
Maria @ Daily Downward Dog
Holly @ Rust Belt Runner
Erin @ Creative Soul In Motion

peace+love,

Related Posts Plugin for WordPress, Blogger...