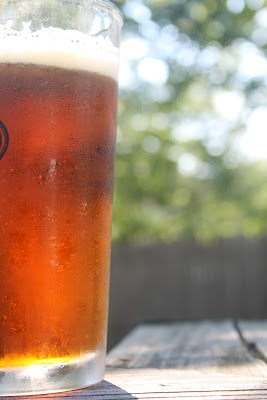
In my post about the Make Vs. Buy price comparison, one of the items that I mentioned was more economical to make rather than buy was beer. Well, it wasn't up until the other night that I actually tasted my own brew.
I'll tell ya what, I was almost shocked that it tasted like real beer. We did it! Made our own beer. Not only is it more economical to make your own beer, but it's not all that hard either! It just takes some time, so if you're planning to do it - make an afternoon of it.
Better yet, make a cold afternoon of it.
We don't have a hood over our stove and, boy, does it get hot in our house when the stove is on all day! Beer brewing is definitely a winter sport.
So, we made a highly successful summer ale (and have creative wedding-related ideas of ways to use the brewski...but, more on that later). There is a whole science behind brewing beer, to which I'm not quite privvy yet, but I aim to be able to come up with my own beer recipes someday. Until then, I'm going to use the pre-made recipe kits and learn as much as possible about brewing.
Here are the brewing basics...
{photocred:http://www.ldcarlson.com/}
Step 2: Clean and sanitize!! Probably the most important part of any kind of fermenting process is the cleanliness of the brewing vessels. If they're not bacteria free, you could end up with mold, or you might even kill the wonderful yeast that is the orchestrator of the whole process; converting sugar to alcohol. I am lucky enough to have a fiance who works in foodservice and has access to a no-rinse sanitizer that they use in the store. I'm sure you can get a good sanitizer wherever you get your brewquipment from.
Step 3: Steep the grains. Some of you are undoubtedly homebrewing experts, but I'm still at the extract kit stage; so everything's packaged nicely and neatly in the correct portions for me before I even begin. Extract brewing is the way the fermentable sugars are provided to you (in extract form) so you just add them to your wort and go. Extract brewing = beginner brewing. Partial mash brewing = intermediate. All grain brewing = advanced. I'll talk more about the other two when I get there. Not yet.
So for now, I steep the specialty grains that come in my ingredient kit, which primarily provide color, flavor and body to the brew, but no fermentable sugars.
Step 5: Add the hops. If you have an extract kit, the directions will tell you when to add the hops and how long you have to boil them. Usually you add the bittering hops first, then the flavoring hops, then the aroma hops (the latter two in the last 15 minutes of the boil). A hoppier beer sometimes has the added step of dry hopping during the secondary fermentation.
Step 6: Cool the wort. As you can see in the picture below, brewing beer is simply a heat transfer problem. To cool the wort quickly (and by quickly, I mean about an hour as opposed to overnight) fill up your sink with cold water and swish the pot around so that the heat is transferred to the cooler water in the sink. You'll have to empty and re-fill the sink several times and it will take about an hour to cool it to around 70 degrees (F).
Step 7: Transfer to the primary fermenter, add water, pitch yeast. When the wort is cooled, you siphon it off the "trub" (the hops sediment that will be left at the bottom of the stockpot) into the primary fermenter. Add enough water to turn it into 5 gallons and then sprinkle the yeast on top and mix it in. Brewing yeast
Step 8: Ferment, and then ferment some more. You can either use the primary fermenter for the whole process, but if you want clearer, more delicious beer, you are gonna want to transfer it to a secondary fermenter about a week into the fermentation stage. The dead yeast cells will precipitate down to the bottom of the primary fermentation pail, then you want to siphon off the liquid into your secondary fermenter (the carboy) to complete fermentation. At the secondary fermentation stage, you can add more hops for a hoppier, IPA-like brew.
Step 9: Bottle. You'll have to transfer your brew to a bottling pail and add corn sugar to it. Once it's bottled and capped, it continues to ferment, but this time it causes the beer to carbonate because the CO2 that is created gets captured inside. Then, more waiting.
(buuut you should definitely taste your beer when you're bottling)
A few weeks later...ta-da!! Beer. Real, live, carbonated beer. Homebrewing has become my new love.
For more resources, some online colleges offer cooking and culinary classes on a wide range of surprising topics, home-brewing included. Oh, and just to set the record straight, the above pictures are not MY homebrew, it's a Goose Island Harvest Ale, our first homebrew was a summer ale that came is a much lighter bodied beer. At the time I was taking pictures for this post, all I had was the Goose Island beer.
My summer ale was surprisingly delicious but (kick me for saying this) I'm actually excited for the fall and all the darker brews that come with it!
Is anyone else excited for the fall??
peace+love,


