Showing posts with label diy vegetable garden. Show all posts

Wednesday, August 3, 2011

DIY Vegetable Garden: Mid-summer Checkup

First off, thank you all for the congrats on announcing my engagement!!

In my last post about our veggie garden(s), the gardens looked like this:


Now, they looks something like this:


Generally in August, we'd be getting a much bigger harvest, but since all the plants got in the ground a month late, our garden is slow on the harvest. I anticipate an August and September high in tomatoes and peppers! In fact, the cherry tomatoes are going off right now:


We have been keeping a notebook so we know what is doing well and where it was planted as well as any other things we've noticed. So far, there are a couple of things I have written down that you might want to take note of in your own gardens:
  • One of our tomato plants is suffering from Blossom End Rot which most often happens when the growing season starts out wet then goes through a dry spell (helloooo, rainy spring). It's basically because of inconsistent moisture content in the soil that causes a calcium imbalance. It's highly unfortunate because the tomatoes that are ready to eat right now are the ones that have end rot. Boo.
  • Sugar snap peas are sparse this year, probably because of getting them planted so late. They also like more sun, because they're doing much better in the center of the garden then they are close to the sides.
  • Next year we want to try growing corn, beans and squash together in a three sisters garden - which is a native american way of growing them so they complement each others' nutritional/growing needs.
  • Sun Sugar Tomatoes are the most tasty cherry tom's you'll ever eat. They're little, orange and delicious. Grow them. STAT.
  • The butternut squash is very happy in the far left corner of the in-ground garden. Case-in-point:


How is your vegetable garden doing thus far?

peace+love,


Did you miss the rest of my veggie garden posts? Catch them here:

Friday, June 17, 2011

DIY Vegetable Garden: Plants in the Ground!

Here is my third (and final...maybe...) installment of the DIY Vegetable Garden series. I've learned a whole lot in my gardening endeavors this year and have a lot to take into next year from it. 

Since it was so rainy this spring, we weren't able to put anything in the ground until almost June!! Hopefully that doesn't have too many adverse affects on the harvest this summer, but now it's just a wait and see game. 

HOME GARDEN STEP FOUR: (Finally!) Put your plants in the ground. 

For both the raised beds and the in-ground garden, we put soil on top of the weed-blocking tarp, for aesthetic purposes. Neither Brandon nor I want to look at black tarp all summer.


So, in order to place our plants, we first had to cut through the soil/tarp and then dig our holes. This was actually pretty easy, because most of the time the spade was adequate to cut through the tarp. 


IMG_2448


Well, except the rosemary. We are keeping that one potted so we can bring it inside for the winter and have year-round rosemary!

So what did we decide to plant this year?
  • 20 pepper plants, some sweet, most of them hot
  • 15 tomato plants, all different varieties
  • Mesclun lettuce
  • Spinach
  • Swiss chard
  • Thyme (regular and lemon)
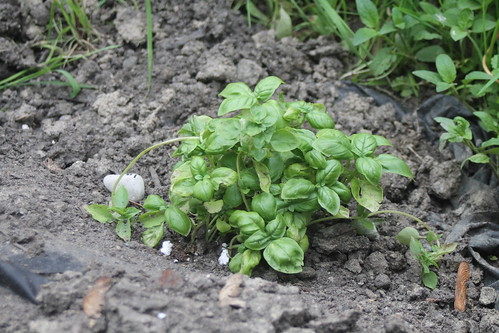
  • Basil
  • Chives
  • Dill
  • Lavender
  • Broccoli
  • Carrots (three whole rows!!)
  • 2 potatoes...but we want more!
  • Red cabbage
  • Brussels sprouts
  • Sweet corn (this is a big experiment for us)
  • Watermelon
  • Butternut squash
  • Eggplant
  • Cilantro
  • Onions
  • Sugar snap peas
  • Asparagus
Phew! I think we're going to start our own CSA :)


Here are a few things I've learned about gardening:
  • Spring greens need to get outside early because they like it cooler (ahem, broccoli!) so if you can't put them in the ground, pot them and put them outside. Broccoli will go straight to seed if it matures when it's too warm. 
  • If you don't have enough room for all the seeds that you started in your garden, expand your garden!! We didn't have enough room for the vine plants so we added on to our in-ground garden in an area that is still separate from the rest of the plants, so the vines don't take over. 
  • Asparagus takes 2+ years until you get a harvest out of them. Just be patient. 
  • Next year, I want to try rolling "seasons". Essentially put in spring plants early, and once they're harvested the summer plants will go in, then once those are harvested, late summer/fall plants will go in. Might be able to catch the tail end of this idea this year. We'll see. 
Does anyone else have a garden at home? What did you plant?


In case you missed them, here are the other two installments of my DIY Vegetable Garden posts:

Thursday, June 9, 2011

DIY Vegetable Garden: Weed Block and Potting Saplings

Did you enter my 2Toms ButtShield giveaway yet?? Go check it out!! You have until Friday at 11 am EST
~ ~ ~ ~ ~ ~ ~

This is part two of my DIY Vegetable Garden post series. I realize that it may be a bit too late in the year for this already, but we were late getting basically everything in the ground because of the wet, wet spring we had.


HOME GARDEN STEP THREE: Cover planting area with weed block tarp


Last year, the garden quickly got overrun with weeds and for two people who work full time, it was too much to keep ahead of. This year we're trying Weed Block. We put down the weed block tarp and then (mostly for aesthetic purposes) covered it with more soil. I don't think that is actually necessary, but I'd rather look at soil than at tarp with plants poking through.


When you put plants in the ground, you're going to have to cut through the tarp to place them. So far, the weeds have been pretty subdued in the places where the tarp was laid. 

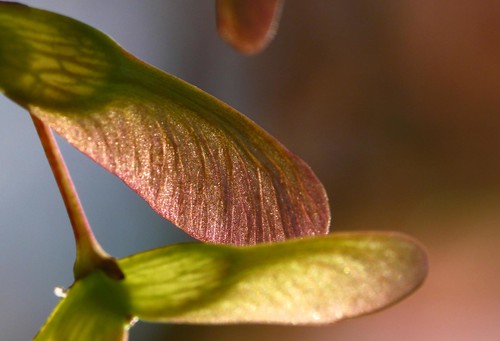
Except for those stupid maple whirlybirds. They drive me nuts.
And they're sprouting everywhere!

This is what our garden looks like with the tarp down and soil covering it: 
(please note the whirlybirds all over the place)

HOME GARDEN STEP THREEPOINTFIVE: Get saplings potted

We had to take an extra *half* step in the home garden process because of all the rain this spring. The ground was saturated throughout April and May and we could not put the seeds that we had started, or the saplings that we had bought into the ground. 

We were able to fill the raised beds with veggies towards the end of May, but no luck with the in-ground garden. Our saplings were starting to look sad in the plastic containers that they were purchased in, so we decided to invest in lots and lots of little pots. 

If your plants are starting to die because they can't go in the ground, pot them and place them in the area of the garden that they will be when they're planted. 


This bought us an extra couple of weeks until the ground dried up (helloooo 90 degree weather!) Stay tuned next time for getting your plants into the ground, and what to do if you have more plants than space in the garden!

Happy Gardening,


In case you missed it, here is the other installment of my DIY Vegetable Garden posts:

Wednesday, May 25, 2011

DIY Vegetable Garden: Tilling and Filling

I am actually a bit behind on this post, we've made more progress than what is shown in the picture below, but I haven't taken any more pictures yet. So I'm doing this home project post in installments. Welcome to part 1 of the

DIY Vegetable Garden!!!

Brandon and I have been patiently waiting for the rain to finally subside so we can devote some time to our gardens. In the back yard, we currently have a 10'x36' in ground garden and are putting in two raised beds. The raised beds are going to be primarily for tomatoes and peppers so we can put them where they'll get the most sunlight.

We've slowly but surely been moving forward on this project! There have been a few days of sun here and there that we've tried to take full advantage of. While we can only work in the garden in steps right now, because of how wet everything is, we are definitely getting somewhere. With luck, by mid-summer, we'll have a bunch of veggies to share!

...and when I say "a bunch" I mean, we have about 15 tomato plants and just as many peppers, which isn't even the half of it! We went a little crazy with the Groupon for Gale's Garden Center. 

HOME GARDEN STEP ONE: till and rid the garden of weeds

This is what our garden looked like after all the snow melted: 

Roto-tilling the garden (this is about one-quarter finished)

My job was to pull up rogue weeds that the tiller missed, it was muddy


HOME GARDEN STEP TWO: put down and fill the raised beds

(This isn't a mandatory step, but we decided a while ago that we wanted to add to the garden by adding a few raised beds. Plus, more garden space = more veggies! With how wet it's been, it looks like raised beds are going to be our saving grace this year.)

The two 4'x6' beds are going to go right here:

A few two-by-twelves later, ta-da!

We ordered 3 yards of soil from Kurts Brothers to fill the beds and to mix in with the Ohio clay that our in-ground garden is full of. Many wheel barrows full of soil later:

There is still more work to be done, but that's what we were able to accomplish on the Friday before our marathon (shoveling soil before a marathon...poor choice? maybe.)

I am thoroughly looking forward to getting plants in the ground when everything dries up. Wish us some luck on that...this has been Cleveland's rainiest spring on record.

peace out girls scouts,


Related Posts Plugin for WordPress, Blogger...